
Bringing Alaska Native beadwork into classroom art projects offers students a unique hands-on opportunity to learn about history, culture, patience, and creativity all at once. Working with beads isn’t just about making something nice to look at; it’s a way to connect with stories passed down through generations, honor Native traditions, and help students appreciate cultural diversity right in their own schools. I’ve spent time trying various types of beadwork, and I can say firsthand that it’s both challenging and pretty relaxing once you get the hang of it.
Alaska Native Beadwork: A Quick Intro
Alaska Native beadwork has a rich history shaped by regional tribes such as the Athabascan, Yup’ik, Inupiaq, and Tlingit peoples. Beadwork started as a practical art, decorating clothing, pouches, and footwear long before glass beads arrived. Indigenous artists used shells, animal teeth, and seeds as their original “beads.” When trade beads showed up in the 1800s, the whole craft really took off, morphing into something even more unique that carried meaning and history. Today, these designs tell personal and cultural stories, often rooted in the land and family tradition.
For students and teachers, exploring this art form isn’t just about technique. It’s a window into understanding powerful traditions and honoring the Alaska Native communities who keep these arts alive. I always recommend doing a bit of background research on the region and people who made the style you’re going to try. The Anchorage Museum and the Alaska Native Heritage Center have great online resources for digging deeper and tracking down lesson inspiration.
Alaska Native beadwork also ties into larger stories about trade, adaptation, and expression. For thousands of years, creativity bloomed with what was at hand. When new materials arrived—like the glass beads that came through global trade—artists instantly mixed these into their own motifs and techniques, adding pops of color to old patterns and making each region’s beadwork feel different. It’s a living tradition, still changing today as artists add their own twist.
Preparing for a Beadwork Project at School
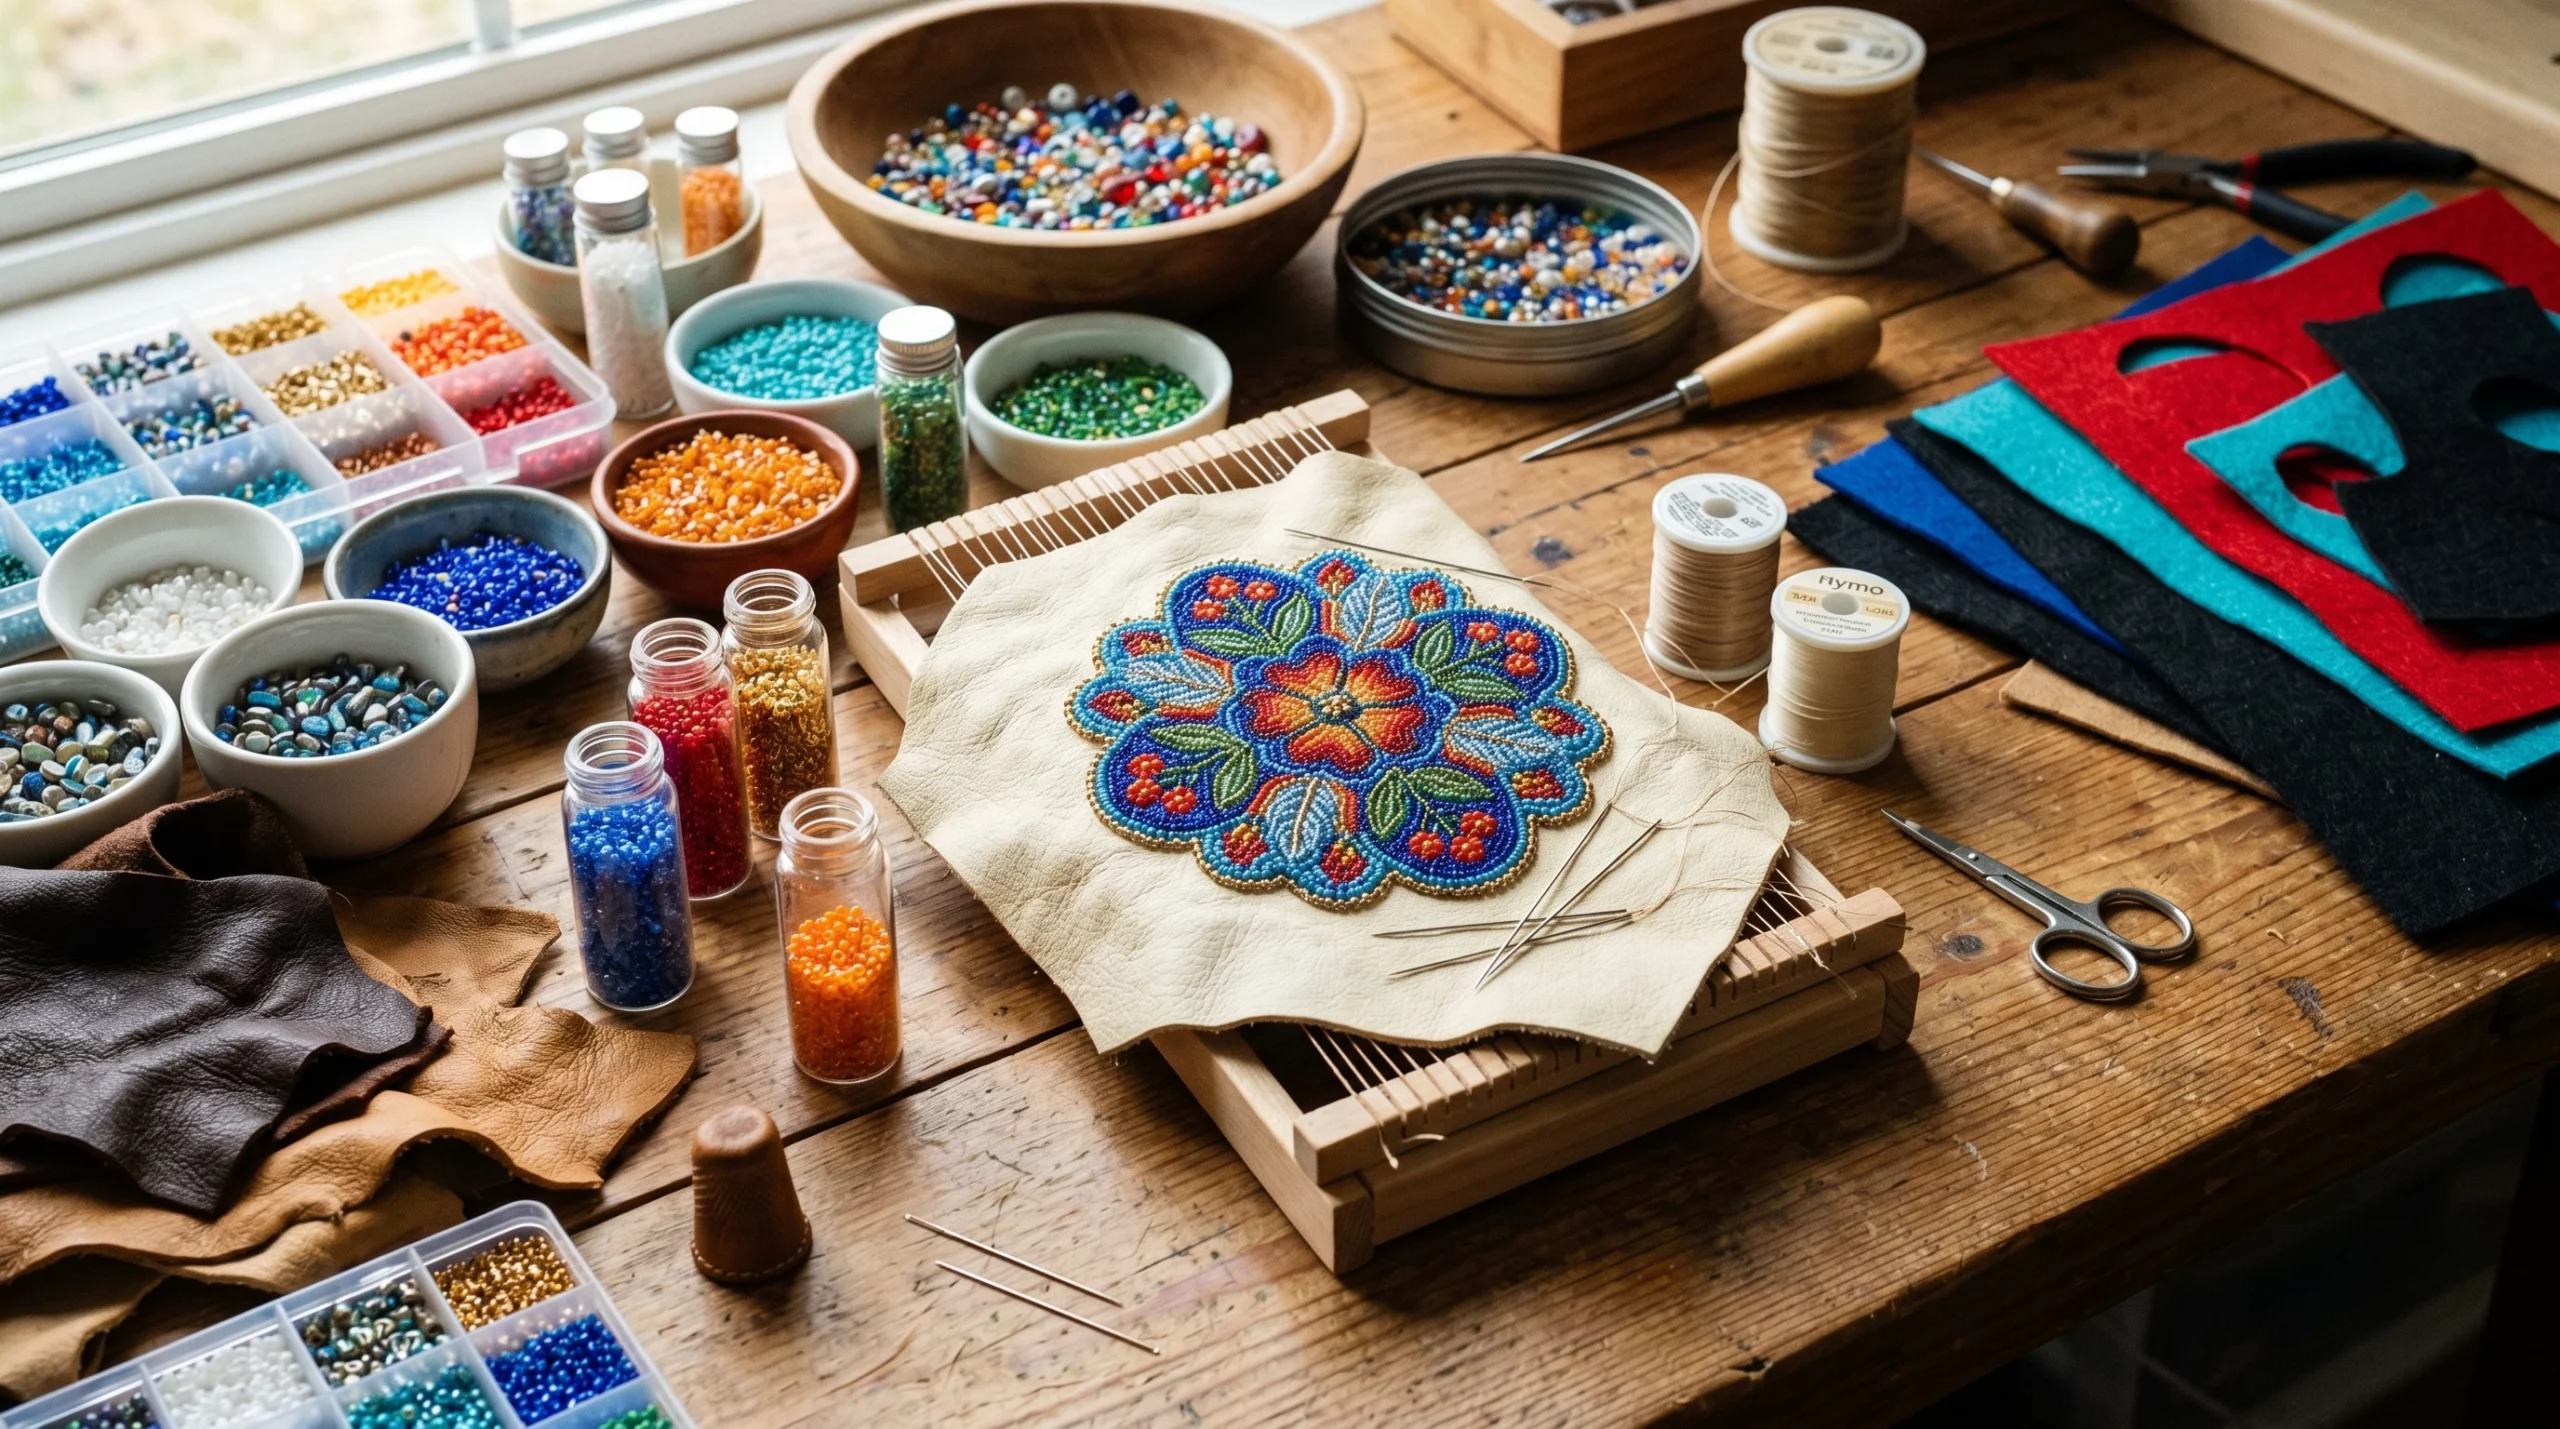
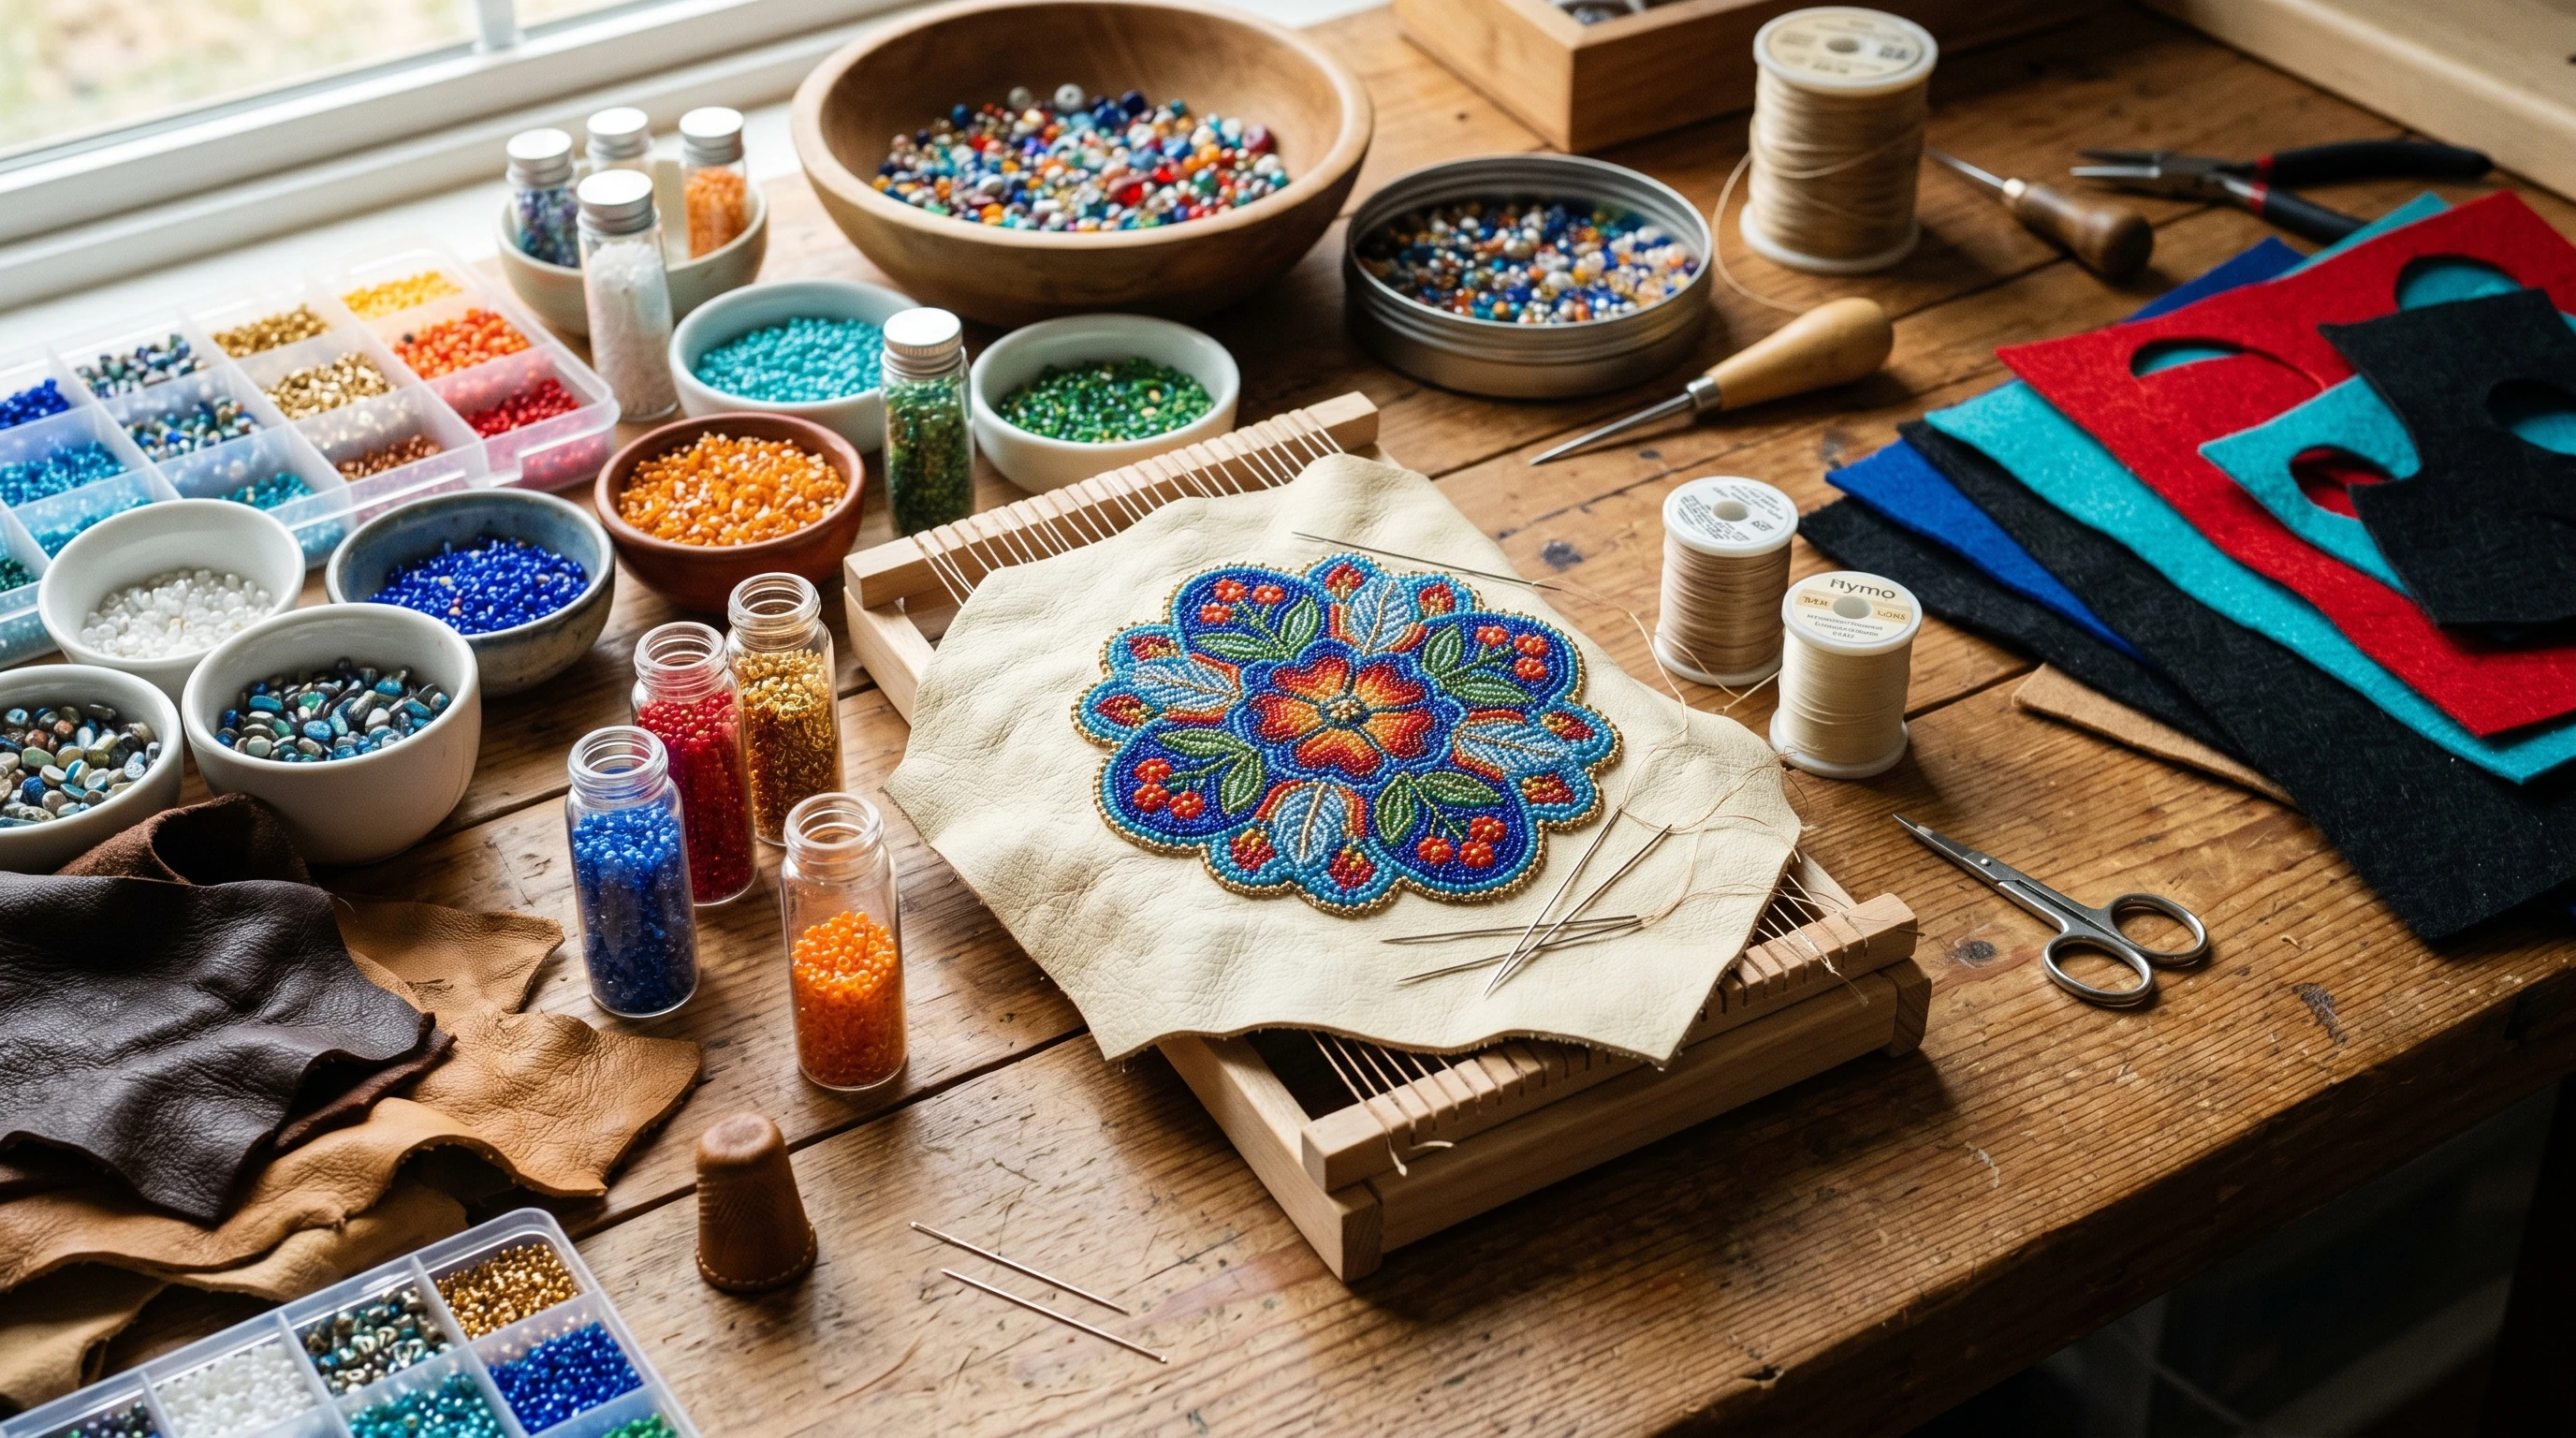
Before starting, I like to gather the right supplies and set expectations with students. Beadwork requires focus, patience, and a stretch of class time to see real results. Desks might get busy with beads rolling around and threads tangling here and there, but there’s a real sense of pride when a project comes together. Here’s what I usually set up:
- Seed Beads: The most popular pick for Alaska Native beadwork. Sizes 8/0 or 10/0 are good for students just starting out.
- Needles: Special beading needles are slim enough to pass through tiny beads several times. I find size 10 is manageable for kids.
- Backing Material: Felt sheets or leather scraps both work well for backing. For schools, felt is budgetfriendly and comes in lots of color choices.
- Thread: Nylon or polyester beading thread holds up the best. Regular sewing thread can break more easily, especially if students pull hard.
- Small Bowls or Containers: Helps keep bead colors organized and prevents beads scattering during class.
Some schools reach out to local Alaska Native artists for demonstrations or support. This is a great way to honor the tradition, get extra tips, and avoid cultural missteps. If that’s not possible, showing short videos or reading personal beadwork stories before getting started can help build respect for the art.
Teachers sometimes game plan a circle at the start of class to check in with students and make sure everyone understands the cultural significance of what they’re about to make. It helps everyone get in the right frame of mind before the beading process begins.
Popular Beading Techniques for Beginners
There are quite a few stitch styles in Alaska Native beadwork, but for most school art projects, I usually stick to ones that are easy to teach and quick to pick up. Here’s a quick rundown of the most common ones:
- Lazy Stitch: Beads are grouped in short lines, then sewn down all at once. This works well for simple patterns and decorative stripes.
- Running Stitch (a.k.a. Bead Embroidery): Each bead is sewn one by one, making curves and round designs easier. This is my personal favorite to teach because it’s super flexible.
- Edge Beading: Once a piece is finished, adding a line of beads around the edge gives it a polished look. Students love seeing the piece look complete after a final round of beads.
When I teach, I share examples of beaded flowers, animal paw prints, or geometric border designs that pop up across Alaska. These shapes make great practice patterns that are simple enough for students but still rooted in traditional motifs. Showing finished projects or photos can inspire students to picture their own final result and get excited for what’s ahead.
If students seem ready to try something more challenging later on, you can introduce flat stitch or two-needle beading as a way to add detail without making things too complicated for beginners.
Setting Up an Alaska Native Beadwork Project in Class
Getting started can seem like a challenge, so I always break things down into steps to keep it manageable for teachers and students alike. Here’s a basic project format that’s worked well for me:
- Intro & Cultural Context: Share beadwork history, talk about its importance for Alaska Native people, and show sample pieces. It’s super important to discuss art respectfully; not every symbol or style is open for everyone to use.
- Design Templates: Print basic patterns for students to use or let them sketch their own. Hearts, flowers, simple animal tracks, and circles work well for beginners.
- Transfer the Design: Trace or lightly draw the pattern onto felt or backing material before beading. I usually use erasable fabric pens.
- Stitching Practice: Show students how to thread needles and tie a knot at the end. Practice simple running or lazy stitch lines on scrap fabric before starting real pieces.
- Beading the Project: Work beadbybead, following the design. I check in along the way, especially in the first rows, to prevent threads from tangling.
- Finishing Touches: Attach finished patches to bags, bookmarks, or keychains, or simply display them as art. Optional edge beading or felt trim gives a finished look.
I encourage teachers to set a calm, focused tone during beading. Some students might finish fast, while others need more time. Having music or quiet time during this part makes a big difference, and giving plenty of encouragement keeps everyone going when fingers get sore from poking needles through thicker fabric.
A fun classroom activity is to have students swap designs and try to replicate someone else’s pattern. This encourages students to pay attention to detail and gives them a new appreciation for someone else’s creative choices. It’s a great way for students to mix in some variety and work together on their beading adventure.
Tips for a Positive Experience
- Be Patient: Mistakes are common, especially when beads get loose or patterns don’t line up the first time. I remind students (and myself) that it’s part of learning.
- Use Small Projects: Starting with bookmarks, magnets, or small patches keeps things achievable in a couple of class periods.
- Encourage Story Sharing: Some Alaska Native artists include personal or family stories with their beadwork. I love when students come up with stories that go with the symbols they use; maybe a favorite animal, place, or family memory.
- Respect Cultural Boundaries: Not every traditional pattern or color is appropriate for everyone to recreate. I always talk with local artists or do research if there’s any doubt, and encourage students to focus on universal or personally meaningful designs.
Providing extra beads and spare supplies for those who want to experiment helps encourage creativity. Sometimes opening up the last session for students to try their own color combinations or designs makes the whole project feel more personal.
Challenges and How to Handle Them
Like any art, beadwork comes with a few common hurdles:
- Fine Motor Skills: Some younger students or those with dexterity challenges will need extra guidance threading needles and picking up tiny beads. Larger beads can make things easier for beginners.
- Bead Spills: Even after years, I still lose beads under desks. Keeping projects in trays and using small bowls helps. Vacuums are helpful after cleanup!
- Material Costs: Beads, felt, and needles add up quickly for big groups. Buying bulk or reaching out for community donations is worth checking out if budgets are tight.
- Time Management: Finishing beadwork takes patience and time, so I plan for extra sessions or send projects home for those who want extra practice.
Finding Local Resources and Support
Many communities in Alaska have artists who are happy to visit classrooms, share their work, or answer students’ questions. If you’re outside Alaska, Native organizations, museums, and craft shops sometimes run virtual workshops or provide educational kits. The Anchorage Museum’s website and the Alaska Native Heritage Center both have resources worth checking out, with downloadable guides, patterns, and even videos showing expert beading in action.
Don’t overlook your local library or community center, either. These spots sometimes have Alaska Native art books with pictures and project ideas, and you can ask librarians for leads on local beadwork experts or guest speakers to bring into your classroom.
Creative Ways to Showcase Student Beadwork
- Set up a school or classroom art display featuring finished beadwork and a written statement about what each piece means to the student.
- Combine beadwork with other media, like watercolor or drawing, for a mixedmedia art show.
- Make a community mural or quilt using felt patches with individual beadwork designs joined together. This can help foster teamwork and give everyone a sense of pride in contributing.
Encouraging students to talk about their creative process and the meaning behind their designs brings even more depth to the project. I love watching students explain their choices and hear the unique connections they’ve made through the experience. Sharing photos of finished projects with families or on the school website is also a great way to spread the word and celebrate students’ creativity.
Frequently Asked Questions
Question: Is it okay for non-Native students to try Alaska Native beadwork?
Answer: Learning about beadwork is a good way to appreciate and respect Alaska Native culture, if it’s done thoughtfully. Always give credit, use open-source designs or general themes, and avoid sacred motifs unless you’ve received community guidance.
Question: What if students finish at different times?
Answer: Have a few extra activities (like drawing, beading pattern practice, or writing about their piece) for early finishers. Everyone works at a different pace, and finishing is less important than learning the process.
Question: Where can I find beadwork templates and lesson plans?
Answer: The Alaska Native Heritage Center and Anchorage Museum offer downloadable resources, and sites like the National Museum of the American Indian have general beadwork lesson plans suitable for schools.
Final Thoughts
Introducing Alaska Native beadwork into school art projects goes far beyond just creating pretty crafts. It’s about fostering cultural respect, giving students a new hands-on skill, and opening up creative ways to connect with history, and with each other. Projects like these might take a little more prep and patience, but they’re worth it for the stories, pride, and new perspectives students walk away with. Students not only get to craft nextlevel cool pieces but also walk away with skills and cultural insight they’ll carry for years to come.
If you have any questions or comments, feel free to leave them in the comments below.