
Alaska Native beading has a long and rich history. Many families have passed down techniques and traditions for generations. Making crafts like beaded earrings, pouches, or regalia isn’t just a fun way to spend time together; it connects kids and parents to art and culture in a really hands-on way. If you’re looking for beginner friendly ways to get into it with your child, there are some great resources and practical advice to help you get started.
Why Alaska Native Beadwork Stands Out
Beading isn’t new to Alaska Native communities. Even before European traders introduced glass beads to the region, Alaska Native artists used shells, bone, seeds, porcupine quills, stone, and sinew for decoration. After glass beads arrived in the 18th and 19th centuries, beading quickly became a key part of many Indigenous art forms found from Southeast to Northwest Alaska.
Each Alaska Native group has its own style and unique patterns. For example, Athabascan beadwork often features vivid floral motifs, while Inupiaq and Yup’ik beadwork might focus on geometric shapes or animal forms. Beadwork commonly decorates clothing, moccasins, jewelry, bags, and ceremonial items. Passing down these techniques happens through teaching and everyday making, keeping the culture vibrant and alive.
Choosing Beginner Bead Projects for Kids and Parents
The right project can make a huge difference for first-time beaders. Kids tend to enjoy projects with quick results and color options, while parents may want a bit more challenge or to play with traditional designs. Simple items like keychains, bracelets, medallions, or even beaded pins offer a gentle introduction without overwhelming anyone. Small felt patches or coin purses are perfect, as they don’t take too long and kids get to show off a finished product they can actually use.
- Beaded Keychains: Use a basic pattern and a metal split ring to make a quick charm.
- Simple Earrings: Kids who are a little older or have practiced basic stitches can try stringing beads onto wire or felt for wearable art.
- Decorative Felt Patches: Great for beginners, letting you experiment with color and design before moving onto more intricate works.
Focus on easy to follow patterns, and remember, it’s all about enjoying the process. Perfection isn’t the goal; having fun and making memories together is what matters most.
Supplies and Materials for Alaska Native Beading
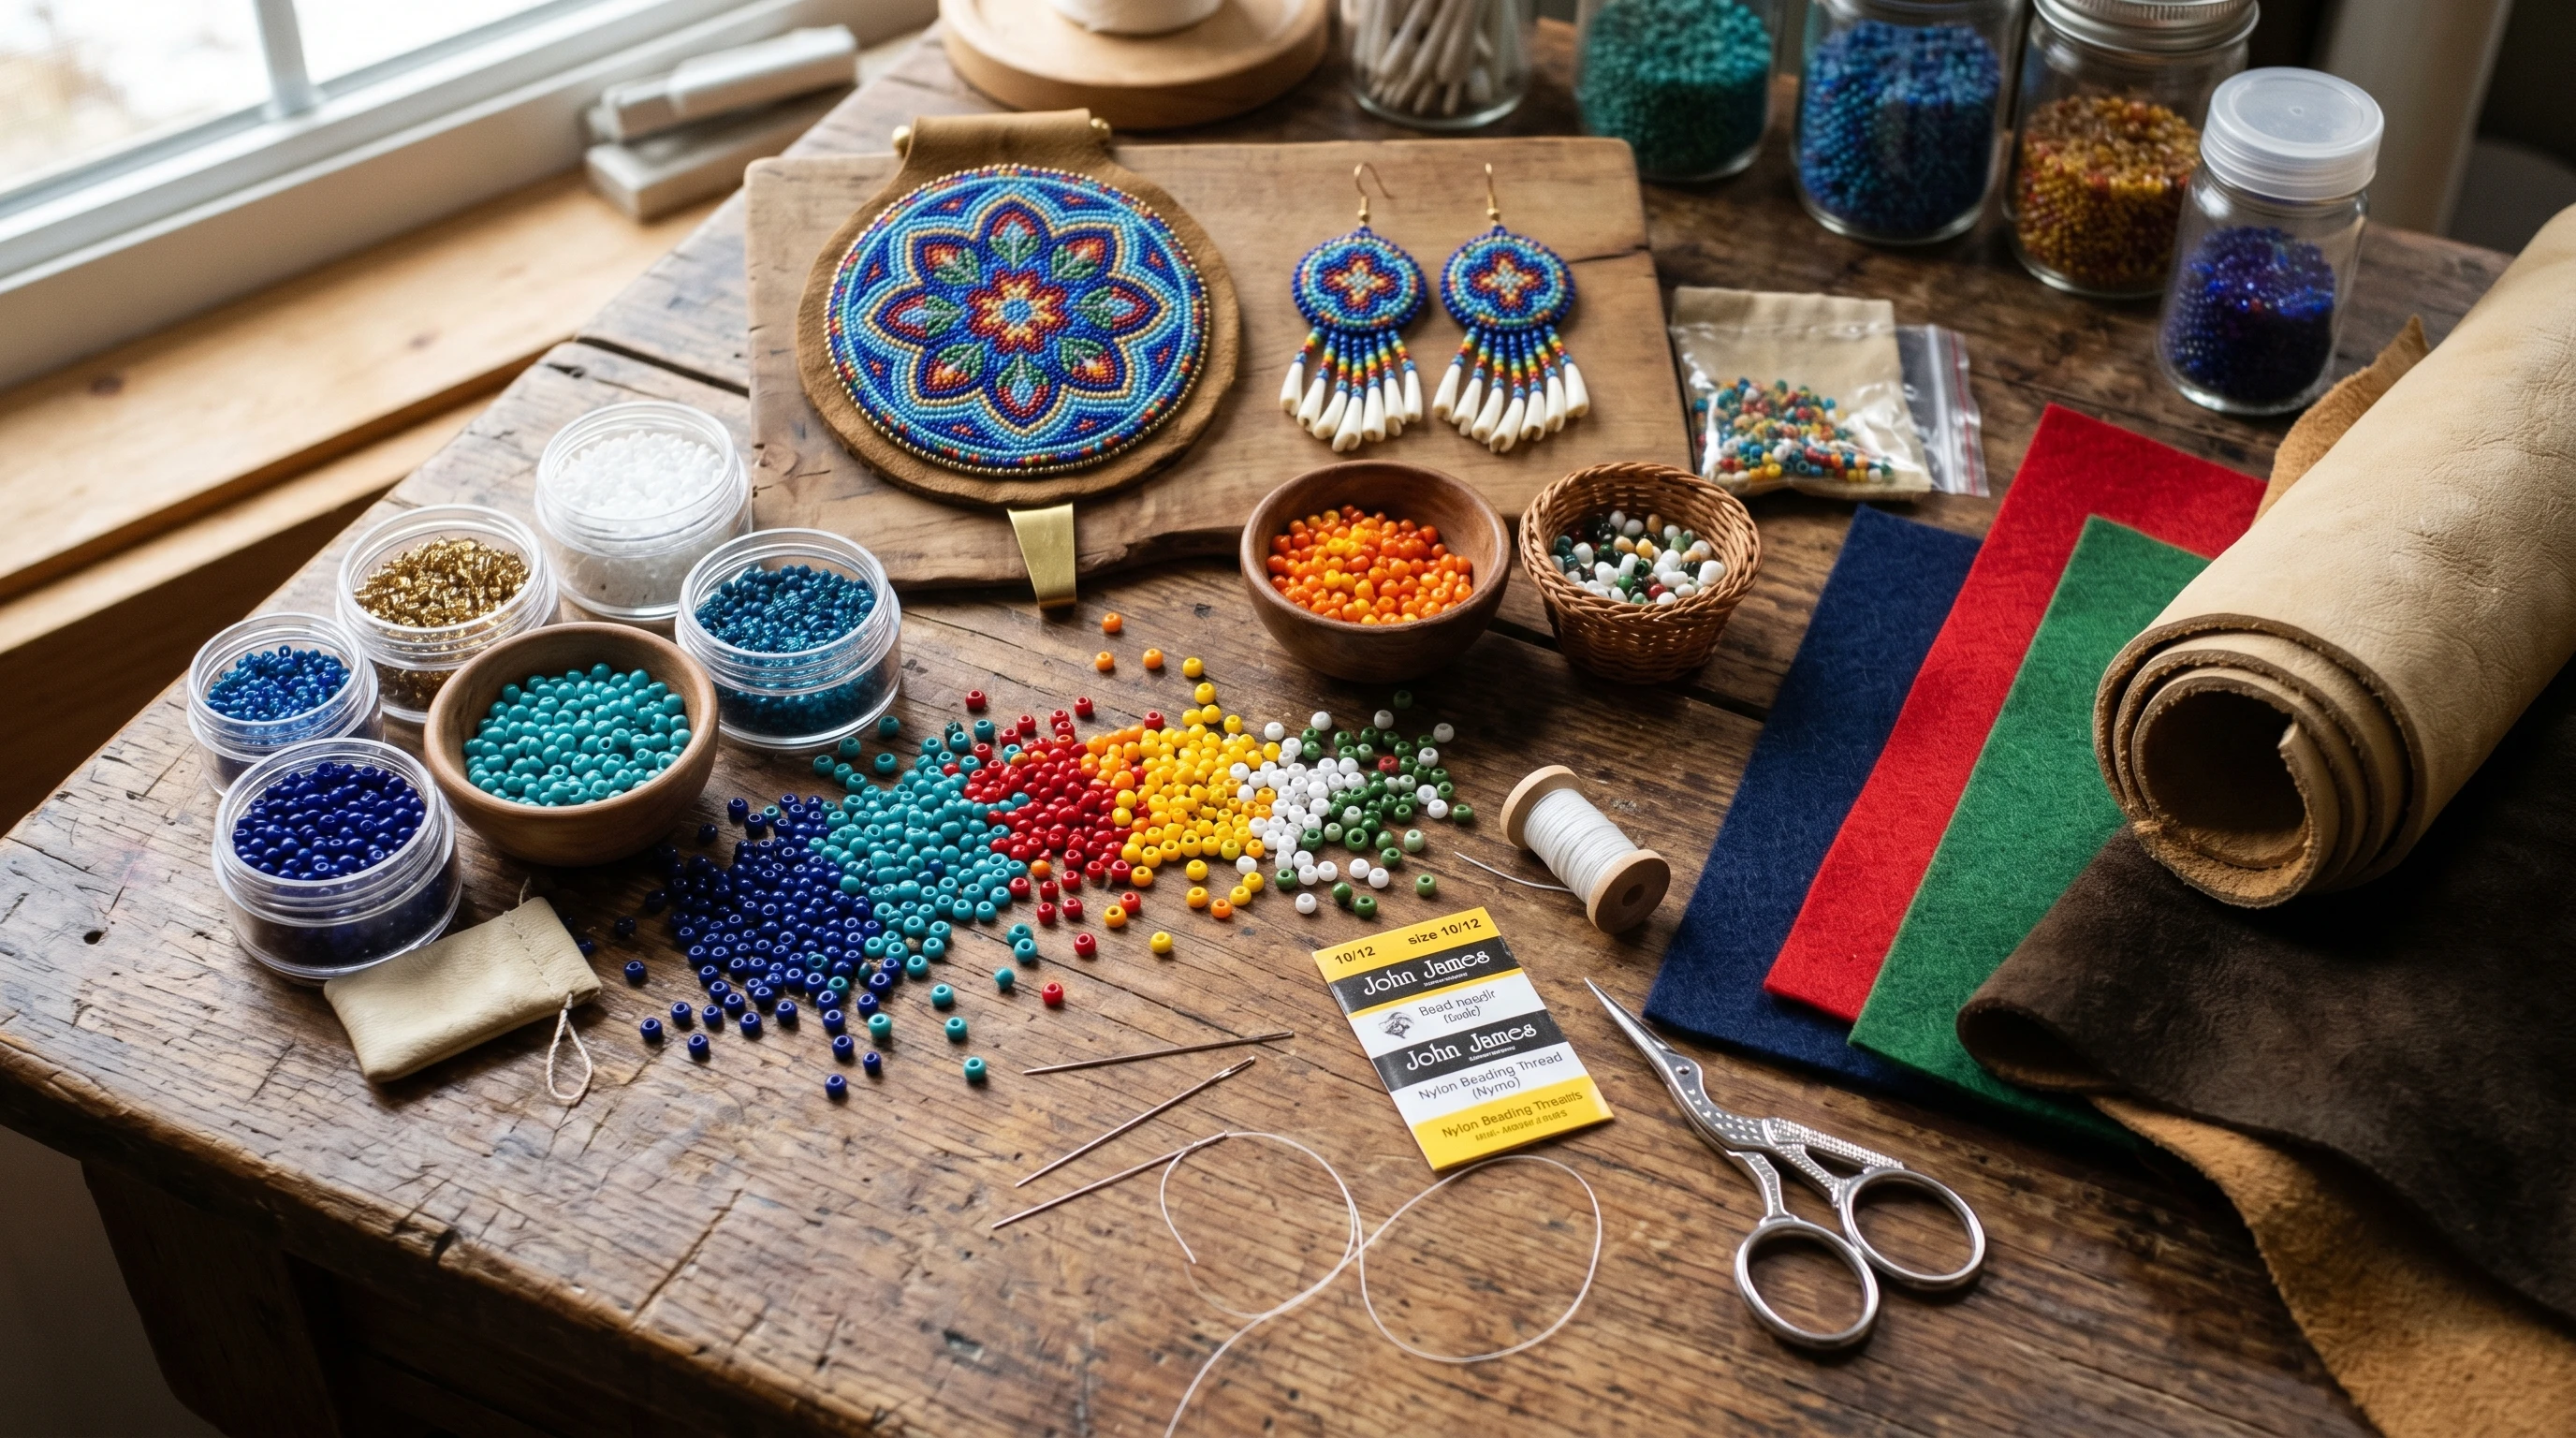
Having supplies ready before you start helps everyone stay focused and makes things run smoothly. Here’s what you usually need when working with children and parents new to the craft:
- Seed Beads: The most common size is 11/0, but larger sizes (like 8/0) can be easier for little fingers to handle.
- Needles: Size 10 or 12 beading needles are flexible and thin. Blunt tipped needles are a bit safer for kids.
- Thread: Strong nylon thread (like Nymo or FireLine) or even dental floss works well for durability.
- Backing Material: Felt, leather, or thick fabric stabilizes the design and gives a nice base for stitching.
- Scissors and Small Containers: Sorting beads by color and keeping the area tidy is helpful, especially with kids.
If you prefer traditional materials, try using natural sinew or locally made beads, which many Alaska Native artists recommend. Some Nativeowned craft stores offer kits and tutorials online, which are worth checking out if you’re just starting out. You might also stumble upon community events or classes that provide extra support and instruction.
Basic Techniques Every Beginner Should Know
If you’re new to beading, there are a few fundamental techniques that will help you feel confident. Most Alaska Native beadwork uses these stitches:
- Running Stitch: The basic stitch for attaching beads in a line. Thread the needle, string a few beads, and sew down through the fabric at the end of the row.
- Lazy Stitch: Used often for geometric shapes. You put several beads on the thread, then tack them down at regular intervals, creating a raised effect.
- Backstitch: Great for stronger and neater lines. After sewing a few beads, bring the needle back through earlier beads to tighten the row.
- Peyote Stitch (optional for older kids): This takes a little more patience, but it’s great for making detailed or tubular beadwork, like bracelets or amulets.
Practicing these techniques can help children build dexterity and boost their confidence for more detailed projects later. Mistakes aren’t a big deal; most beads can be undone and restitched easily. That’s pretty handy when working with kids!
Step by Step Example: Simple Beaded Patch
One good beginner project is a basic beaded patch. Here’s an easy guide you and your child can follow:
- Draw Your Design: Begin by sketching something simple, like a flower, heart, or animal, on a small piece of felt (around 2×2 inches).
- Thread the Needle: Cut about 18 inches of thread, tie a knot at one end, and thread your needle. Doublethreading gives a little more strength.
- Bead the Outline: Starting at one end of your design, add three or four beads, then sew through the felt to secure them. Keep going, following the shape you’ve drawn.
- Fill the Inside: Use short, straight or curved rows to fill in the rest of your design with color.
- Finish Off: Tie off the thread securely on the back and trim any excess.
This project usually takes about 30 to 45 minutes. Kids feel a real sense of accomplishment, and they can attach their patch to a backpack, hat, or jacket.
Working With Children: Tips for Success
Beadwork with kids isn’t just an art lesson; it’s also a great way to build patience, fine motor skills, and confidence. A few tips to keep everything positive and productive:
- Start with short, focused sessions; young kids do best in 20- to 30-minute bursts.
- Let them choose their own colors. Kids love picking their own bead combinations, even if they’re not traditional.
- Help with tricky parts like threading needles or fixing knots, but give kids chances to figure things out on their own.
- Talk about the stories behind the beadwork. Share family stories, community histories, or traditional meanings if you can.
- Praise effort more than results. The experience and time together matter most!
When teaching kids, you’ll notice they enjoy showing off their finished creations and sharing what they learn with friends and family. That feeling is one of the best parts of doing these projects together. If you can, try connecting your beading activity to a bigger conversation about culture, family history, or Alaska Native traditions.
Common Challenges and How to Handle Them
Like most crafts, beading can have its tricky moments, especially when working with kids. Here are a couple of common issues and ways to handle them:
- Spilled Beads: Use a tray or shallow box to contain beads, and set out small bowls for sorting extra colors.
- Knots or Tangles: Cut shorter pieces of thread, which are easier to manage. If a knot happens, try to untangle it gently, or just cut it and start fresh.
- Needle Pricks: Blunt or flexible beading needles help prevent accidents, and it’s good to take frequent breaks to rest little hands.
If frustration pops up, take a short break or switch roles. Over time, small mistakes won’t seem like a big deal; they’re just part of getting the hang of things together. Building patience as a team is as important as the beadwork itself.
Advanced Ideas and Cultural Exploration
Once you and your child are feeling comfortable with basic beading, try mixing in some advanced projects or dig into the cultural roots of this art. Research patterns tied to your family’s heritage if you have Alaska Native ancestry, or reach out to cultural centers and local artists for workshops or demos. You can experiment with beading onto shirts, hats, or traditional footwear, and combine beads with natural materials like moosehide or birchbark for new textures.
If you need more inspiration, museums like the Anchorage Museum or Alaska Native Heritage Center have real-life examples on display and often offer family craft sessions. Nativeowned online shops and nonprofit groups post video tutorials and pattern PDFs too. Exploring these resources not only helps you learn technique, but also connects you to the stories and histories behind each piece.
Frequently Asked Questions
Here are answers to some questions parents often ask when starting Alaska Native beading projects with their kids:
How old should my child be to start beading?
Most kids ages 5 and up can work on simple projects with larger beads and blunt tipped needles. With supervision and patience, even younger children can start stringing beads for basic jewelry.
Where can I find easy Alaska Native bead patterns?
Lots of tribal organizations, artists, and museums share printable or video instructions online. Look for beginner projects for kids, and ask about classes at local cultural centers.
Can we substitute modern materials if we can’t get traditional supplies?
Definitely—felt, embroidery floss, and glass beads from the craft store are great for practice. Many families use what’s available, and recycled goods can add a creative spark.
How do I help my child stay patient during longer projects?
Divide a big design over a few sessions and celebrate the little milestones. Remind your child that even experienced beaders take breaks, and it’s okay to work at your own pace.
Getting Started Is the First Step
Trying Alaska Native beading as a parent-child activity is rewarding for all sorts of reasons. Besides making something eye catching, you’re connecting with a living tradition and building up new family memories. Start simple, keep supplies handy, and have fun learning together. As you work on more projects, look for local or online resources, or contact Alaska Native organizations for deeper guidance. Over time, your skills and creativity will grow, and you’ll make keepsakes your family treasures for years to come.
If you have any questions or comments, feel free to leave them in the comments below.