
Making beaded earrings is a super fun project for kids. It’s full of color, creativity, and a bit of hands-on learning tossed in too. Whether your kids are making jewelry for themselves or thinking up cute gifts for friends and family, these little accessories can really spark their imagination. Here’s my all-in-one guide to making beaded earrings for kids, from what you’ll need to creative ideas for making every pair unique.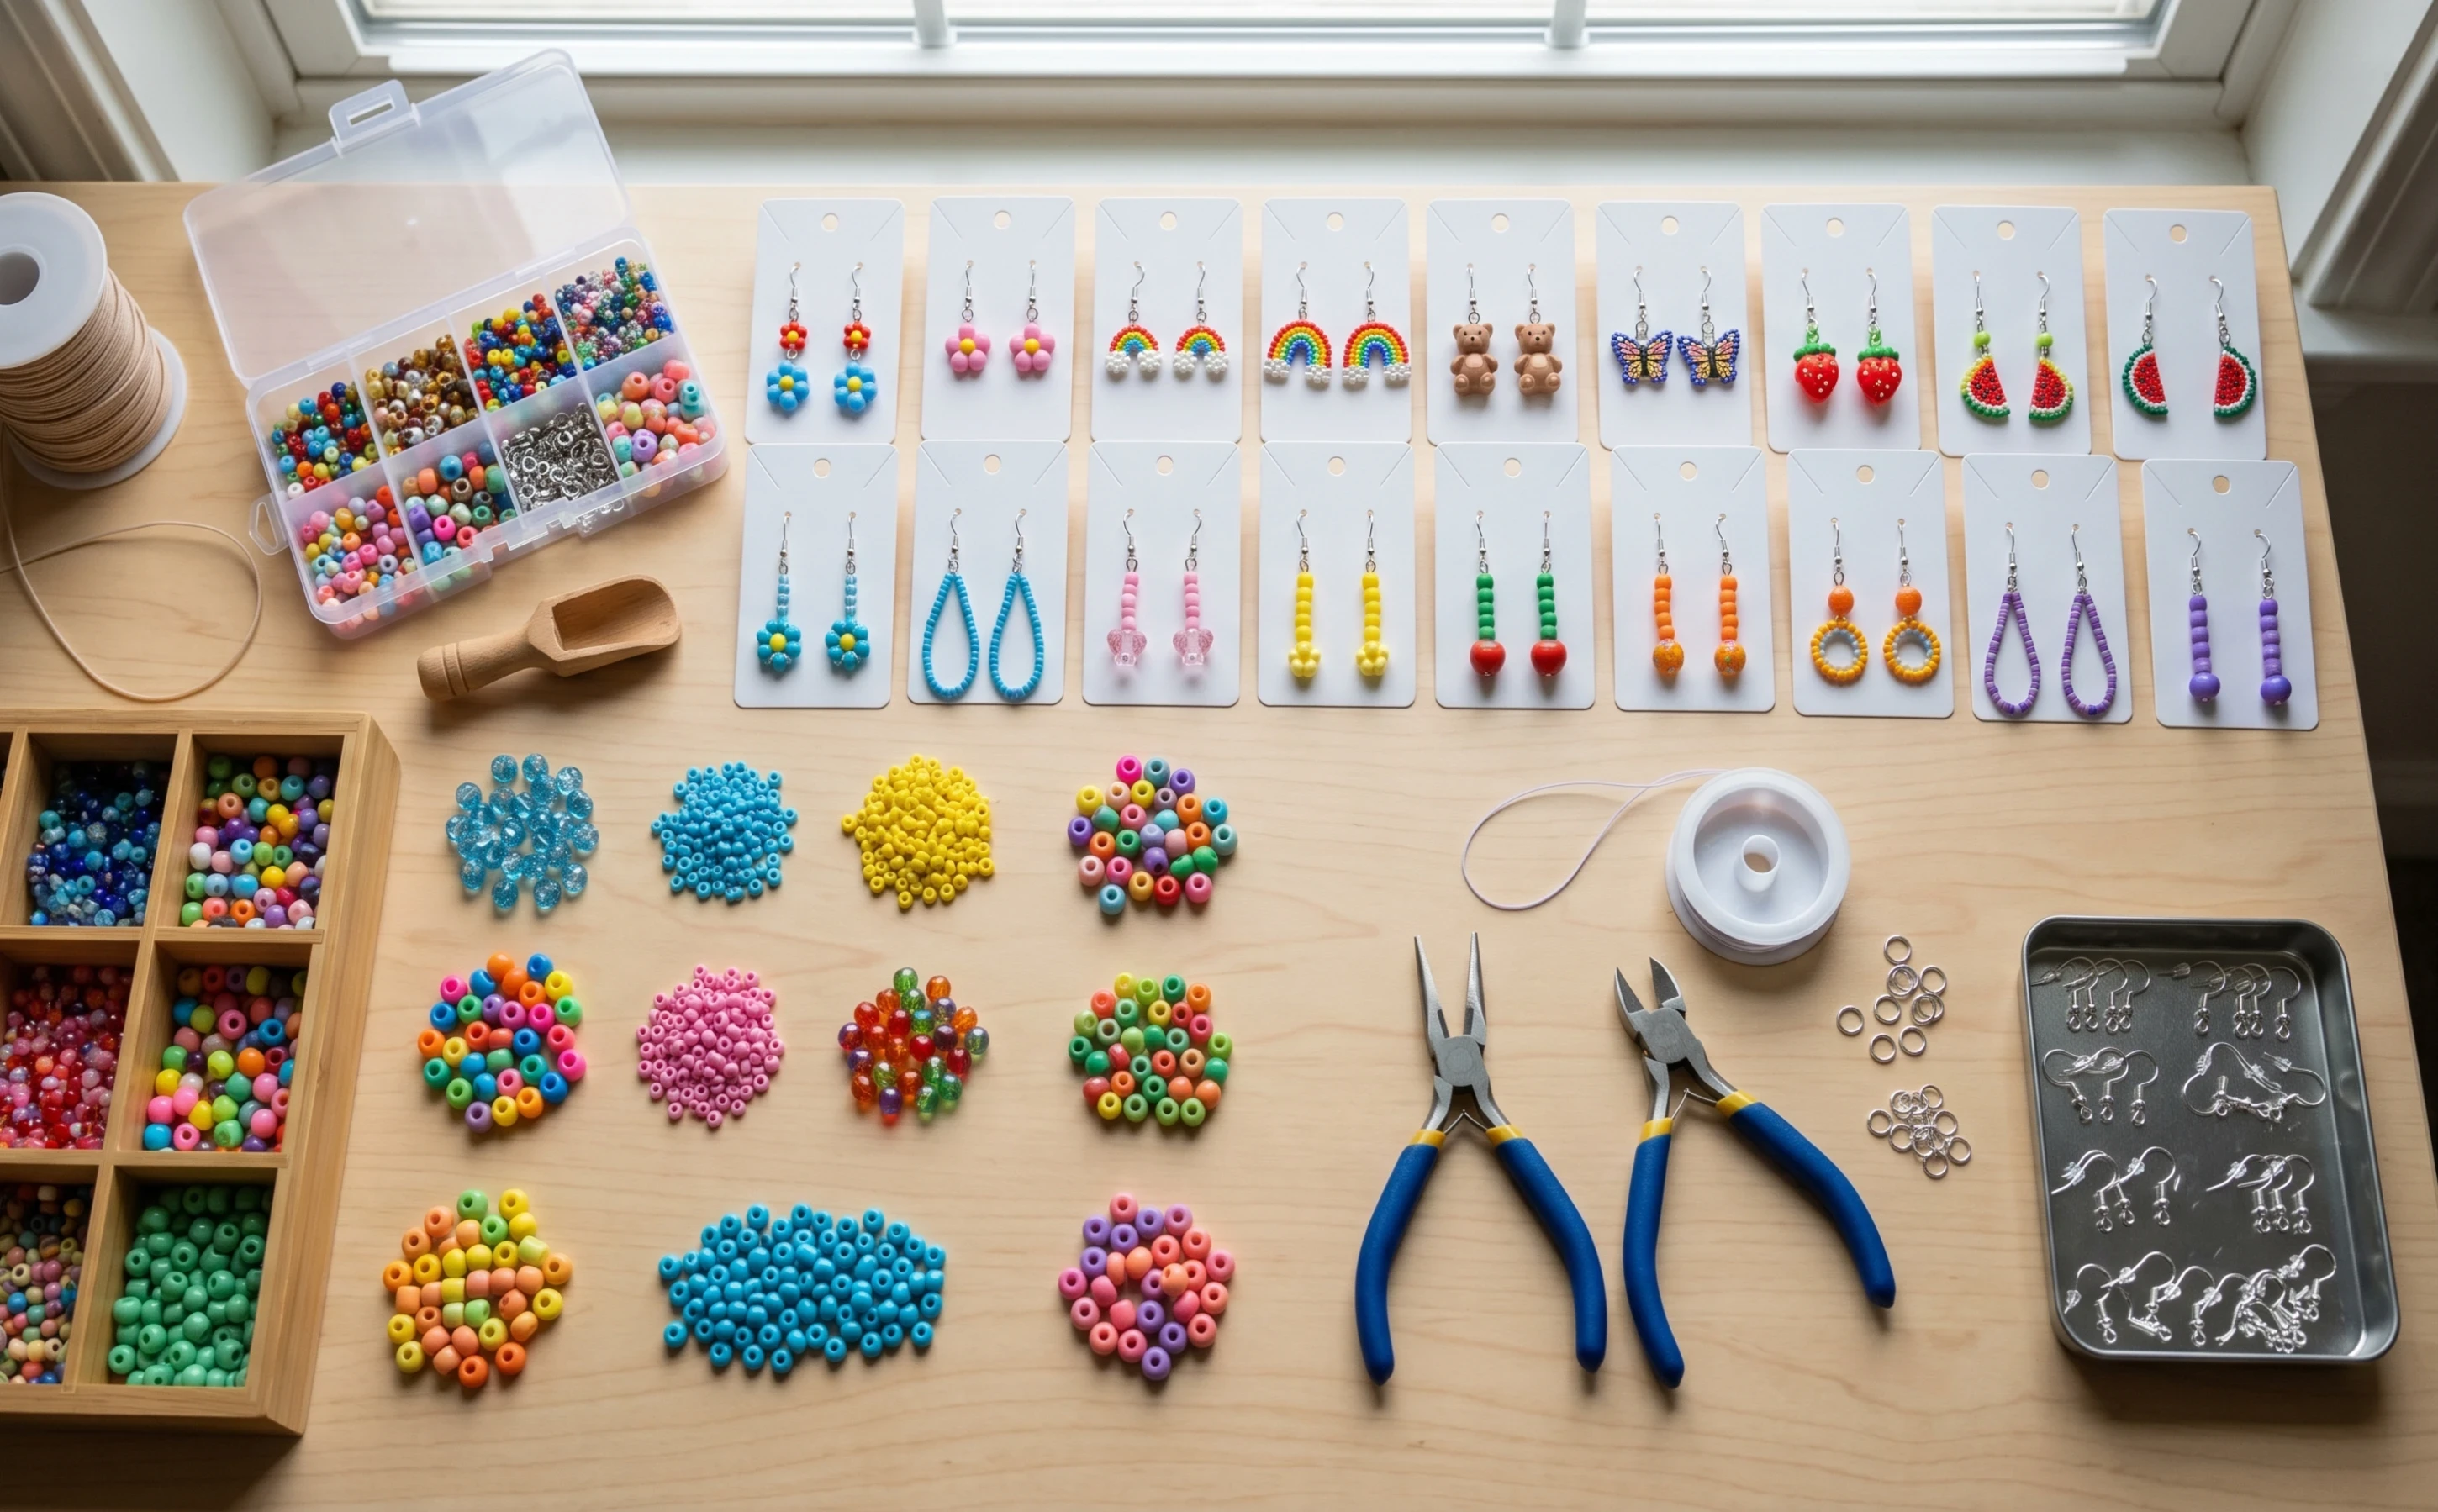 Must-Have Supplies for Kidfriendly Beaded Earrings
Getting started with any crafty adventure usually means pulling together the right supplies. For beaded earrings, the list is pretty short, and you can find almost everything at a craft store or even online. Kid-safe tools and colorful materials are the way to go here.
Here’s what I always have handy for these projects:
- Variety of Beads: Bright plastic or wooden beads are great for kids. They’re lightweight, affordable, and easy to handle. Look for larger hole beads for small hands.
- Earring Hooks: French hooks (the classic fish hook style) are easy to find and simple for beginners to work with.
- Jewelry Wire or Headpins: Headpins are especially nice since they already have a stopper at one end, keeping the beads from sliding off.
- Round nose Pliers: These are essential for shaping loops. There are small, kid sized ones available for easier handling.
- Flat nose Pliers: Useful for holding pieces steady, especially while kids twist wire or connect hooks.
- Wire Cutters (Optional): If you’re trimming wire or headpins, cutters are really important. For younger kids, adult help is recommended here.
- Rubber Earring Backs: Keep finished earrings secure and make them comfier for little ears.
Choosing colorful and playful beads can make the whole experience more fun and spark the kids’ design ideas right away. You might even want to get some unique bead shapes—think flowers, hearts, or stars—which can give their jewelry a next-level cool touch.
Easy Step-by-Step Instructions for Making Beaded Earrings
Once all your supplies are laid out, it’s time to start crafting. Here’s how I guide kids through each step:
- Select the Beads: Pick out a color combination for each earring. Some kids love rainbows, while others might go for two or three favorite shades. There’s no wrong way to choose.
- Thread the Beads: Slide beads onto a headpin or some jewelry wire. Stop when it’s about 1 to 1.5 cm from the top, so you’ll have some room to create the loop.
- Bend the Wire: Use round nose pliers to bend the wire just above the last bead creating a right angle. Younger kids often need a little support here. I usually hold the pliers while they help fold the wire.
- Form the Loop: Wrap the end of the wire into a small loop with the round nose pliers. This is how you’ll attach the beads to the earring hook.
- Attach the Hook: Open the loop at the bottom of your earring hook (gently twist sideways, not apart), slide the beaded headpin loop onto it, and close the hook back up.
- Repeat for Pair: Kids love seeing their designs become a perfect matching set, so repeat the process for the second earring, keeping color and pattern as close as possible. Of course, mismatched pairs can be super cute as well.
- Add Rubber Backs: These slide on easily and make earrings comfortable and safe for play.
This process is easy to follow, safe with a bit of supervision, and gives kids tons of freedom to play around with colors and shapes. Try making a simple pair together first and add more complex designs as their skills grow.
Beaded Earring Project Ideas for Kids
Kids never run out of ideas, but here are a few project themes that add a little inspiration if anyone gets creatively stuck:
- Animal Inspired Earrings: Mix round beads for a bumblebee look, or use specialty beads shaped like ladybugs, fish, or puppies.
- Fruit Designs: Red and green beads make great cherries or apples, while yellow ones with tiny green leaves create fun lemons.
- Alphabet Bead Earrings: Add initial beads for a personalized gift or just to show off a favorite letter.
- Rainbow Sets: Line up beads in rainbow order for a burst of cheerful color.
- Holiday Themes: Red and pink for Valentine’s, orange and black for Halloween. It’s easy to tweak for any festive occasion.
- Glowinthedark Beads: These always get lots of “wow” from kids and look pretty awesome in a dark room.
- Sports Inspiration: If your child loves a certain sport, use themed beads or color combos that represent their favorite team.
Most bead packs today come with a neat mix of colors and shapes, so kids can test out a few ideas all in one sitting. If you want an eye-catching look, encourage them to combine bright colors and bold bead shapes.
Safety Tips for Kids’ Jewelry Making
Kids’ safety is super important, especially when craft tools enter the picture. Here’s what I pay attention to when leading these projects:
- Supervise Use of Tools: Adult supervision is a good idea when kids use pliers or wire cutters.
- Use Age Appropriate Materials: Young crafters should stick to large beads and avoid tiny parts they might put in their mouth.
- Choose Hypoallergenic Hooks: Nickel free or surgical steel earring hooks help avoid itchiness or allergic reactions.
- Give a OnceOver to Finished Earrings: Make sure there are no sharp wire ends sticking out. A quick squeeze with the pliers can tuck them in.
- Store Supplies Safely: Keep beads and sharp tools out of reach when not in use.
With just a bit of planning, kids’ jewelry making projects are both safe and stress free. Remind everyone to clear the workspace of small items afterward to avoid any stray beads on the floor.
Common Problems and How to Fix Them
Here are a few hiccups I see most often (and how to handle them):
- Beads Falling Off: If the loop at the top isn’t closed tightly, beads might slip out. Always twist loops firmly closed.
- Earrings Not Matching: For symmetrical sets, lay out bead patterns before putting anything together.
- Wire Too Hard to Bend: Try a slightly thinner gauge jewelry wire or softer craft wire for little hands. Adult hands can finish the tougher shapes.
- Earring Hooks Too Big: Kids might need smaller sized hooks. There are plenty of kids jewelry specific earring hooks out there.
- Wire Scratching the Ear: Double check that no sharp points are exposed. File rough ends or fold them in with pliers.
- Pattern Mixups: Sometimes kids forget the order of beads for the second earring. Take a quick photo or draw the pattern on paper before starting a pair so they can match things up easily.
Troubleshooting together is part of the fun and teaches kids problem-solving and patience. Often, fixes are pretty easy and help build confidence for their next project. Encourage them to stay upbeat and see mistakes as a chance to get creative or try again.
Creative Ways to Personalize Beaded Earrings
Adding personal touches really makes each earring set feel special. A few things I encourage kids to try include:
- Mix and Match: Combine beads from different packs or swap with friends to find fun new styles.
- Add Charms: Tiny plastic or rubber charms make for cute dangles and extra personality.
- Paint or Color Beads: If you can’t find the perfect color, paint wooden beads with safe, nontoxic paints or use permanent markers.
- Use Letter Beads: Spell out short words, names, or messages for a pair made just for a friend or family member.
- Add Tassels or Ribbons: String on a tiny tassel or bit of ribbon for a fun, fluffy accent that shows off their style.
- Use Nature: Try adding tiny polished stones or shell beads for a cool, earthy vibe.
Every child’s style is different, and these ideas help them create earrings as unique as they are. Letting kids choose themes or add family initials can also make the activity extra meaningful.
Frequently Asked Questions
These are the questions I hear all the time when kids (or their parents) are new to making beaded earrings:
Question: Can kids wear their beaded earrings all day?
Answer: Yes, but keep an eye on comfort and make sure the materials don’t irritate the skin. Try short “wear times” at first, especially with new materials.
Question: Where should I track down safe beads and hooks for kids?
Answer: Many craft stores have “children’s jewelry” sections with age friendly products. Online sites like Etsy or stores with lots of craft supplies also list hypoallergenic and kidsafe options.
Question: What’s a good age to try making earrings?
Answer: Kids as young as six or seven can join in with plenty of grown-up help and supervision. Older kids often handle the tools and wire work with just a few reminders.
Starting Your Own Beaded Earring Adventure
Beaded earring projects for kids are colorful, handson, and open up endless chances for creative expression. With a few basic supplies, some simple safety tips, and a little help getting started, kids can enjoy both the process and the final result. Each pair of earrings can be made to fit the style, the season, or just a creative mood that strikes. Encourage them to try out new patterns, mix up their beads, and share their creations, or even organize a jewelry making party with friends. Wrapping up, happy crafting!
If you have any questions or comments, feel free to leave in the comments below.