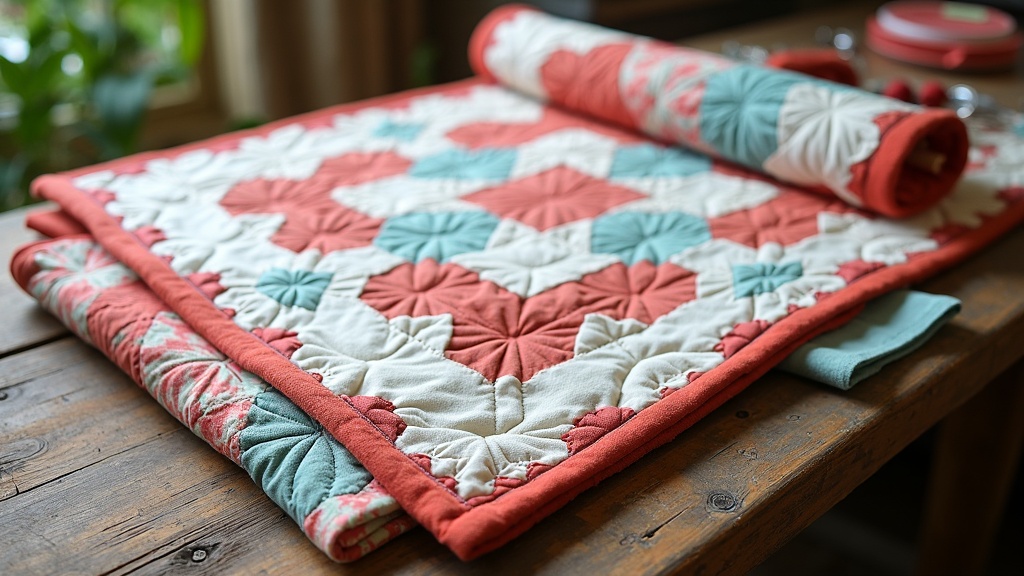
Binding a quilt is one of those final touches that really brings the whole piece together. It frames your handiwork, protects the quilt’s edges, and adds a neat, professional finish. When I started quilting, the binding step seemed intimidating, but I soon realized it’s actually enjoyable once you get used to the process. Let’s get into how I bind a quilt beautifully, covering all the basics and sharing some tried-and-true tricks you can put to use right away.
Understanding Quilt Binding and Borders
Binding consists of the fabric strips that wrap around the raw edges of your quilt, protecting them from fraying and hiding the seams. Borders are fabric strips or panels that go around the inner quilt top before the binding is added. It helps to know how each plays its part before you start your project.
One piece of advice that always stands out: measure your quilt through the center—never the edges—in both directions before cutting your borders. This makes sure your quilt doesn’t wind up wavy or stretched out. Double-checking those measurements and making sure everything is flat and square keeps things on track and looking sharp.
Key Supplies for Beautiful Quilt Binding
Having the proper supplies nearby makes binding a whole lot smoother. Here are the main items I keep within reach:
- Binding strips: Usually cut from cotton, 2½ inches wide is the standard. You can cut them straight-grain or on the bias, with bias binding being best for quilts with rounded edges.
- Rotary cutter and mat: These keep your strips even and neat.
- Quilting ruler: Handy for cutting straight lines and making sure your strips are uniform.
- Sewing machine: Most quilters sew one side of the binding on by machine and finish with hand stitching for a crisp look.
- Thread: Pick one that blends in or adds a subtle accent, depending on your style.
- Wonder clips or pins: These hold the binding in place and make sewing painless.
- Scissors and seam ripper: Mistakes happen, so it’s always good to keep these close to fix anything quickly.
Step-by-Step Guide: How I Bind My Quilts
- Cut and join binding strips: Cut strips 2½ inches wide, then sew them together end-to-end at a 45-degree angle. Press the seams open so they aren’t bulky.
- Prepare the binding: Fold the long strip lengthwise with wrong sides together, pressing it flat. This gives you a doubled, sturdy edge that’s easier to handle.
- Sew the binding to the quilt: Attach the binding to the front first. Match raw edges of the binding to the quilt, sew with a ¼-inch seam, and leave about 8 inches loose at the start for joining the ends later.
- Perfect the corners: To get crisp mitered corners, stop sewing ¼ inch from the quilt’s edge. Fold the binding up, then down so the next edge is lined up, and keep sewing. This technique produces nice, professional corners.
- Join binding ends for a smooth finish: When you get to the start point, lay the ends flat on the quilt. Overlap them by the width of your strip (usually 2½ inches), trim the extra, then join with a diagonal seam. Press that seam open, fold, and finish sewing. This makes the join invisible and lump-free.
- Wrap and finish: Flip the binding over to the back of the quilt, making sure it covers the first line of stitching. Secure it with clips or pins. Then hand stitch using a blind stitch or whipstitch so the finishing is nearly invisible. If you want even more durability, you can machine sew the back instead.
If you’re looking for extra durability for a quilt that will be washed repeatedly, stitching the binding down by machine on both sides can be a good call—just go slowly for the neatest result.
Common Quilt Binding Mistakes and How to Avoid Them
- Wavy edges and puckering: Often happens if borders are cut too long or added without measuring the quilt’s center. Always double-check measurements for flat, even borders.
- Tight or wonky corners: Skipping careful folding at corners can make them bulky or twisted. Take it slow, aligning and folding properly for sharp corners.
- Stitches showing on the front: Hand stitching from the back can poke through if the needle goes too deep. Try a finer needle and matching thread to avoid visible stitches.
- Binding that’s too narrow or too wide: If the strip width and seam allowance don’t match, the binding won’t sit right. Stick to standard widths and be consistent with your seams.
- Bulky joined ends: Sewing binding ends straight across makes a lump. A diagonal seam is much smoother and keeps the binding flat.
Binding Techniques and Popular Styles
You have plenty of binding options, each giving a unique effect. Here are a few popular choices I like to use:
- Double fold binding: Sometimes called French binding, this is a folded strip attached for maximum strength. It stands up well to lots of washing—ideal for everyday quilts.
- Single fold binding: A single layer, works well for smaller projects like table runners or wall hangings where the binding won’t get heavy use.
- Bias binding: Uses strips cut on the bias, making it flexible—perfect for curves, scalloped edges, or rounded corners.
Each method brings something different to your quilt, so don’t be afraid to mix in some variety and see what look you love best.
Tips for a Professional Finish
- Press as you go: Each time you sew or fold, give it a quick press. This keeps everything laying flat and gives your quilt a polished look.
- Hand sew for an invisible finish: Using a ladder stitch or whipstitch with tiny, close stitches makes your thread blend in and disappear in the fabric.
- Pick the right thread: Sometimes you want thread that fades into the background, and other times you might want a contrasting thread as a subtle accent. Both options add flair—pick based on the quilt and your taste.
Don’t forget: Slow, careful stitching and pressing pay dividends for that next-level cool finish.
Quilt Binding FAQs
Here are answers to popular binding questions that come up all the time for both new and veteran quilters.
What is the golden rule for quilt borders?
Always measure through the center of your quilt before cutting and sewing borders. This keeps the fit just right and helps your quilt lay flat—no uneven or stretched edges.
How do you join binding ends seamlessly?
Overlap the ends by the width of your binding strip, trim any excess, then join with a diagonal seam. After pressing and folding, sew the join down for a near-invisible finish that lies flat and looks professional.
What are common quilt binding mistakes?
Wavy borders from bad measuring, lumpy or twisted corners, uneven seams, and visible stitches are all frequent issues. Careful prep work and using that smooth diagonal seam for joining ends will help you avoid most of them.
Do you attach binding to the front or back first?
The usual technique is to sew binding to the front of the quilt first. Flip it over to the back and finish by hand-stitching. If you machine sew the binding on both sides, try turning the quilt over so the stitch line lands on the front for a clean look.
Handy Finishing Touches
- Add a label: Add a fabric label to the quilt’s back with your name and the finish date. It’s that extra touch, and it makes your quilt feel special—especially if you’re giving it away.
- Gentle wash and block: Once bound, a soft wash and blocking (laying the quilt flat and smoothing it out) can help your quilt settle and flatten, especially if the edges still don’t seem even. Try this if your quilt is just a little tight or wavy when done.
Binding can become a soothing part of quilting when you get into the groove. It’s especially satisfying to see those finished edges start looking crisp and tidy. Spending a bit more time on each detail truly steps up your final result. If you’re after more quilt finishing tips, check out resources from the Quilt Alliance or ask at your local quilt shop—they’re often full of wisdom and happy to share their best advice.