
Crafting beaded bookmarks is a fun project that kids of all ages can enjoy. Not only does it help kids build creativity and work on fine motor skills, it also gives them a charming, handmade bookmark to use or hand out as a unique gift. This guide covers everything from gathering supplies to creative tips, so everyone can get the most out of this craft. Plus, I’ve included extra details to help parents, teachers, and craft leaders make this activity even more rewarding.
What Makes Beaded Bookmarks a Great Kids’ Craft?
Beaded bookmarks bring together art, reading, and hands-on fun in a simple, engaging way. Kids get a chance to play with patterns and colors as they string beads and personalize their own creations. These bookmarks are also practical; they slip right into any book, making reading time more exciting. The steps are simple to follow, giving even young crafters a rewarding sense of accomplishment.
Besides being a fun rainy day activity, making beaded bookmarks works well as a group project at birthday parties, classrooms, libraries, or family craft nights. Kids love swapping bookmarks, starting a collection, or gifting them to friends and family. The supplies—mainly beads and ribbons—are easy to find and can be reused for other crafts. Once you get started, the creative options really flow.
A big bonus is how inclusive this craft can be. There are lots of ways to adapt the project for different ages and skill levels. You can keep things basic for beginners or encourage older kids to create more intricate designs and try out new materials. This flexibility means that everyone, from preschoolers to tweens, can make something they’re proud of while working at their own pace.
Gathering Supplies: What You Need to Get Started
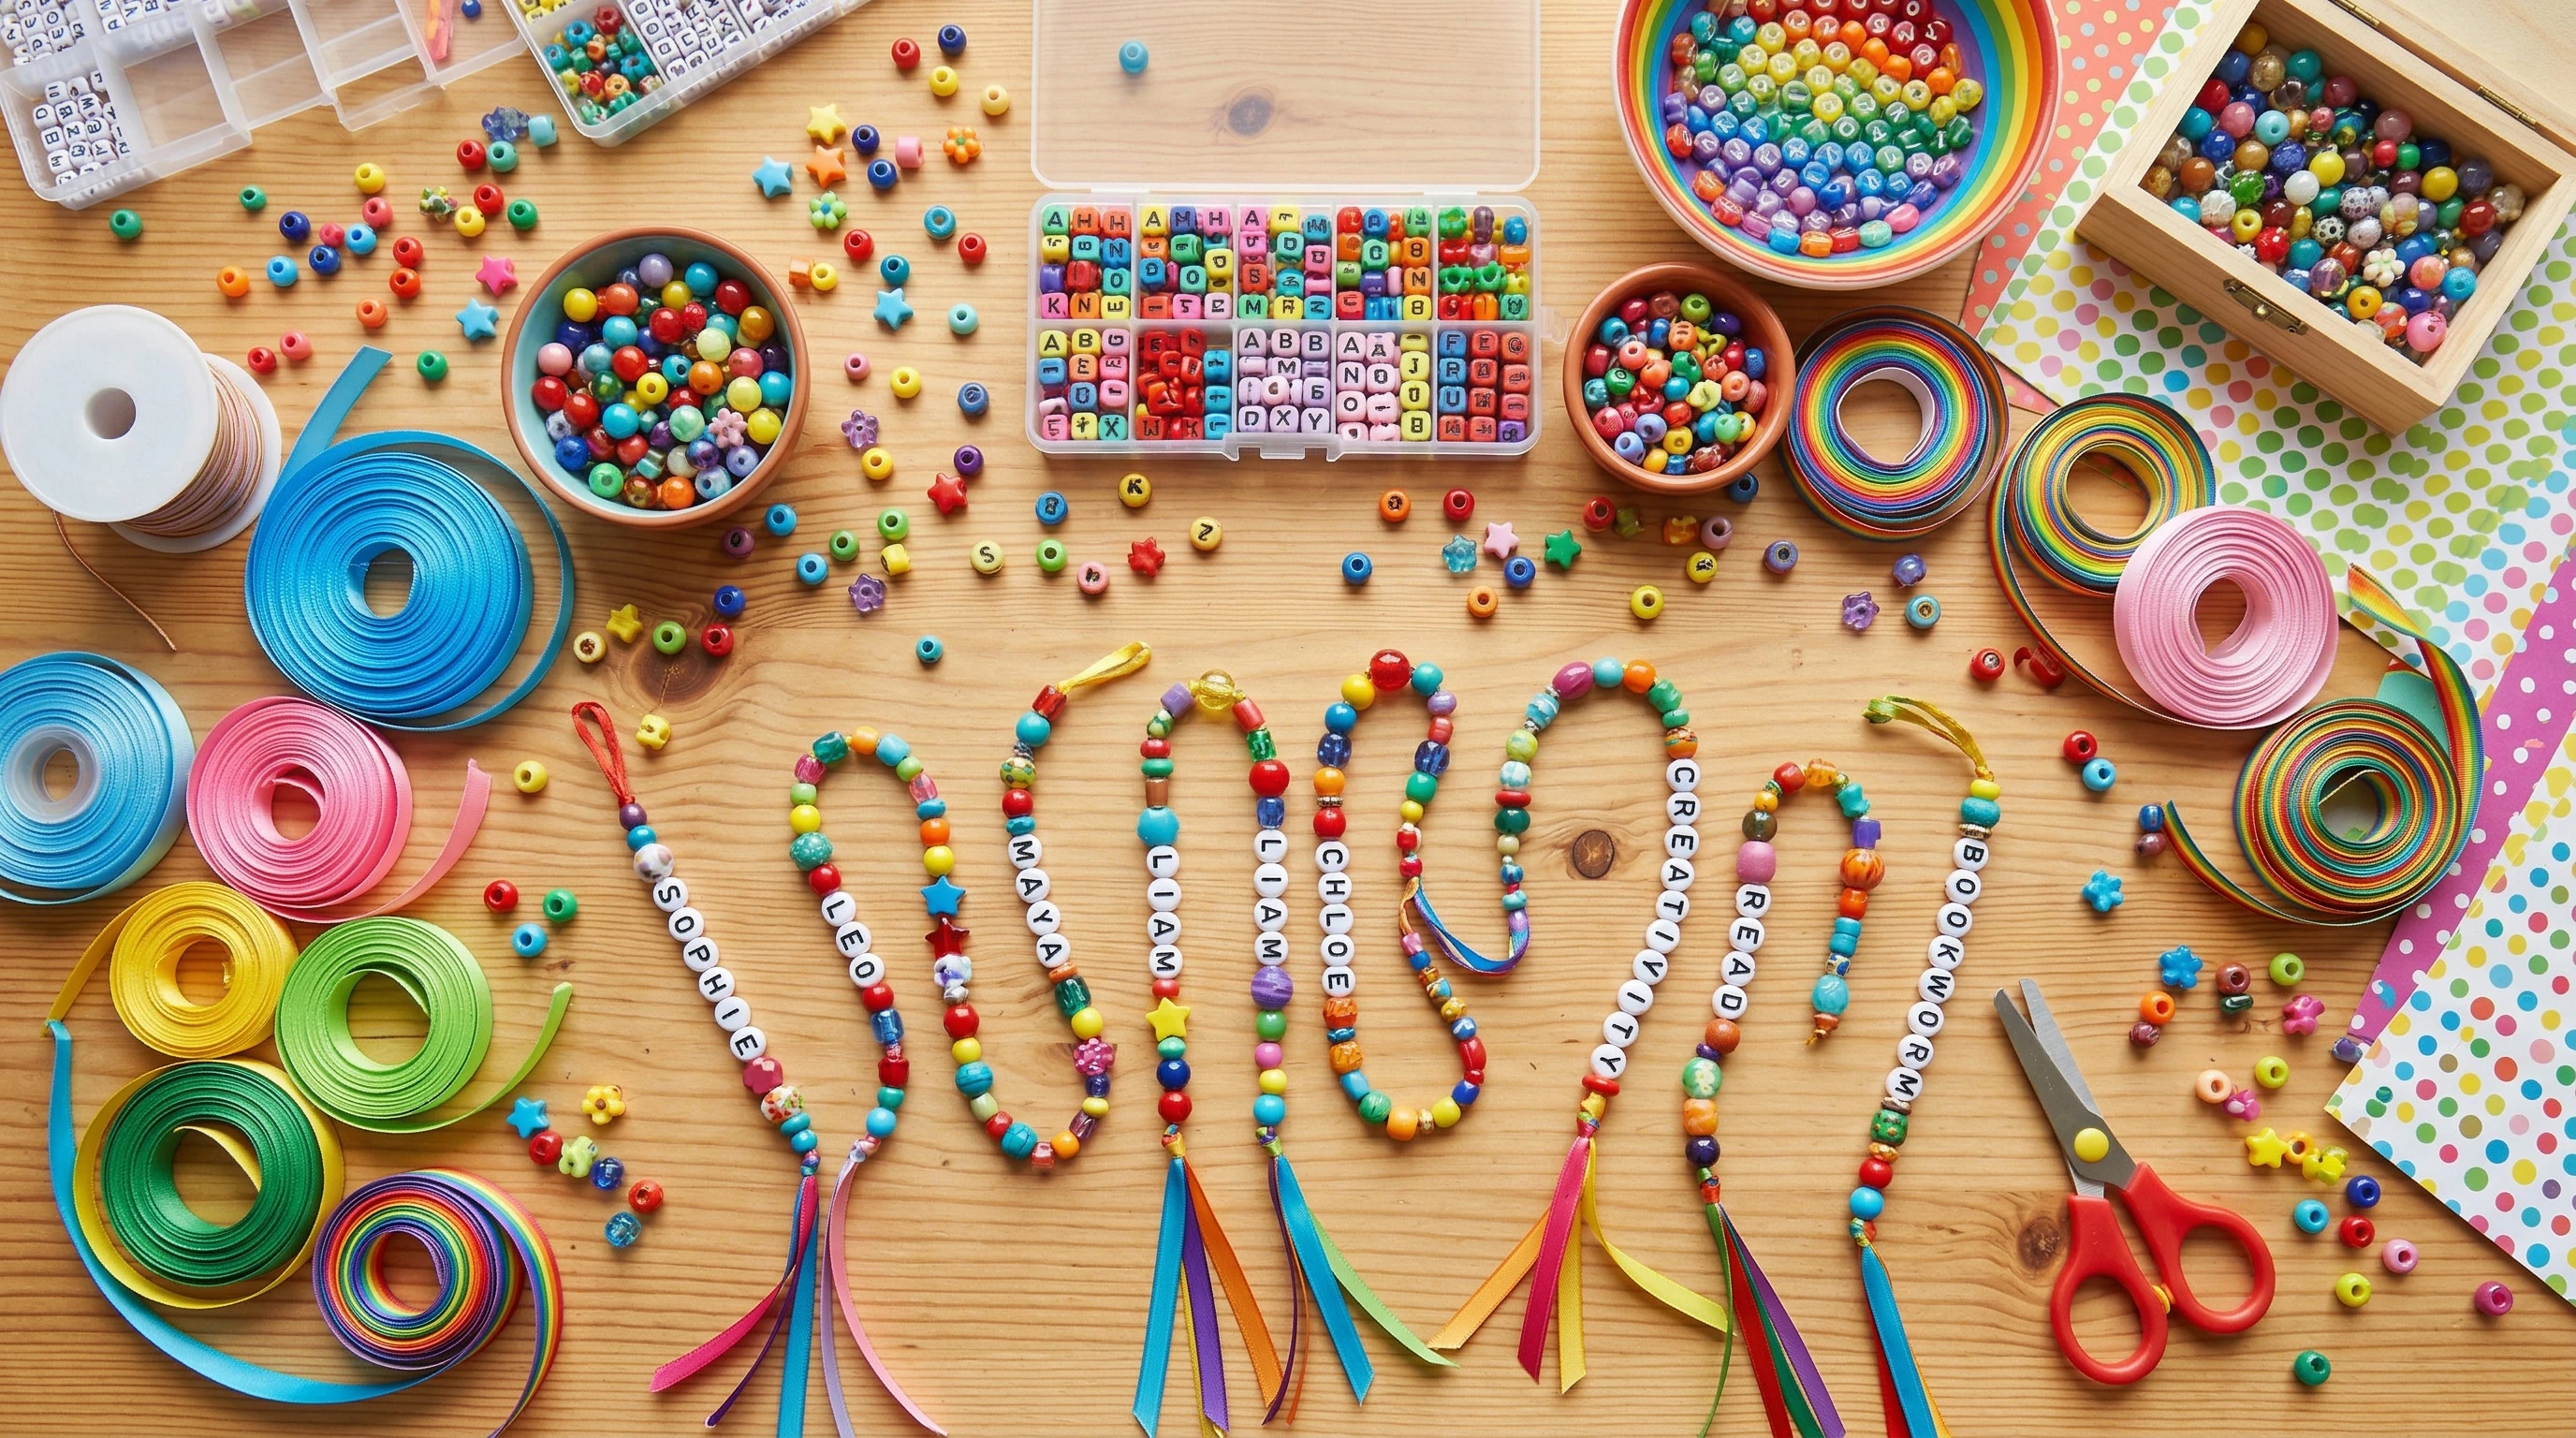
I recommend starting with a few basic supplies, which most craft stores sell in mixed packs or bulk. Here’s what you’ll need:
- Beads: Acrylic pony beads, wooden beads, or plastic alphabet beads all work well. Try mixing sizes for extra variety and texture.
- Satin ribbon or embroidery floss: Around 8 to 12 inches for each bookmark. Satin ribbon lasts a long time and glides easily between book pages.
- Charms (optional): Little metal or plastic charms add a playful detail to the ends.
- Scissors: For cutting ribbon or yarn to the proper length.
- Glue or clear nail polish (optional): Use these to seal knot ends and keep them from fraying.
For younger kids, use larger beads and thicker ribbon so small hands can string them more easily. Older kids may want smaller or more interesting beads, or could even try thin wire or elastic cord for a fancier look. Safety first: if you have kids under six, supervise them with small pieces.
Step-by-Step: How to Make a Beaded Bookmark
With your supplies ready, follow these steps to create a beaded bookmark:
- Cut the ribbon or cord: Measure and cut a piece about 8–12 inches long. Shoot for a length that sticks out just a bit from both ends of a closed book.
- Prepare the ends: To prevent fraying, dab a tiny bit of glue or clear nail polish on each end of the ribbon. Let it dry for a few minutes.
- String the beads: Slide beads onto the ribbon in any pattern or color scheme you like. Leave about an inch at each end, and don’t crowd the beads so the bookmark can fold comfortably inside a book.
- Add a charm (optional): Tie a charm to one or both ends of the ribbon or floss. This extra detail makes your bookmark easier to spot in a book and adds even more personality.
- Knot securely: Tie a firm knot at the end of the ribbon after the last bead or charm to keep everything secure. Double knots work well if your ribbon is slippery.
For different book sizes, just adjust the ribbon length. If you’re working with a lot of kids, pre-cutting ribbon and sorting beads by color or style can help the activity move along smoothly.
Creative Ideas: Themes and Personalization Tips
Kiddos love making bookmarks that feel special and all their own. Here are some ways to personalize each bookmark:
- Name Bookmarks: Alphabet beads are perfect for spelling out a name, a favorite word, or a special message.
- Rainbow Patterns: Use beads in a colorful sequence to make rainbow or ombre effect bookmarks.
- Hobby Charms: Pick out charms based on the child’s interests, like animals, sports, music, or something related to nature.
- Holiday Bookmarks: Use beads and ribbon colors that fit with the season; think red and green for Christmas or orange and black for Halloween.
- Friendship Sets: Kids can craft matching bookmarks and swap them as friendship gifts or with siblings.
Keep extra beads and ribbon nearby in case someone wants to try out a new idea or fix their pattern. If you’re leading a group, doing a short show and tell at the end lets everyone feel proud of their unique creations.
Common Challenges and Helpful Solutions
Even easy crafts have their tricky moments. Here are a few common problems and how to solve them:
- Fraying Ribbon or Cord: Cut the ends at an angle and seal with a dab of glue, a small piece of tape, or a quick heat touch from a grown-up’s lighter (supervised).
- Beads Slipping Off: Tie a knot at the end before threading on beads or make a bigger knot for extra peace of mind.
- Ribbon Too Thick or Thin: Try out bead and ribbon combos before the project starts. If beads won’t fit, a thin shoelace or waxed thread can work as an easy substitute.
- Knot Not Holding: For slippery cords, a double knot with a dab of glue keeps things in place.
- Bookmarks Too Long or Short: Use a favorite book as a guide—measure before you cut to get the right fit.
And here’s a bonus tip for cleanup: sturdy trays, muffin tins, or divided plates keep beads contained, help prevent spills, and make sorting colors a breeze. Little touches like these make the activity go smoother and more fun for everyone involved.
Keeping the Craft Fun and Safe
Safety is key, especially for younger crafters. Watch children under six when using beads, as small items can be a choking hazard. Encourage older kids to help younger siblings with knots, bead sorting, and pattern ideas. All kids should use scissors carefully and be mindful with glue. Keeping paper towels or wipes close by is smart for quick cleanup after crafting sessions.
Easy Upgrades: Advanced Variations and Extra Flourishes
If your kids get really into making beaded bookmarks, try some of these creative twists:
- Multicolor Tassels: Add a mini tassel for extra flair; embroidery floss makes colorful tassels easily.
- Doublesided Beads: String beads on both ends to mark the top and bottom, or to make the bookmark symmetrical.
- Layered Charms: Stack several charms or beads at the ribbon’s end to create a cool, layered effect.
- Wire Bookmarks: Swap in bendable craft wire instead of ribbon for a more grown-up style that holds fun shapes—think initials, spirals, or hearts.
- Glowinthedark or glitter beads: These are always a hit during sleepovers, themed reading nights, or kids’ reading challenges.
Kids sometimes like to wrap their finished bookmarks in tissue paper or attach handmade cards. These make standout party favors, teacher gifts, or rewards for reading milestones. The more you try, the more creative twists you’ll stumble upon—get ready for collection after collection!
Real-World Inspiration: Where Beaded Bookmarks Fit In
Beaded bookmarks aren’t just fun for craft time; they pop up in everyday life too. Teachers and librarians often hand them out as rewards during reading programs. Parents add them to greeting cards, Easter baskets, or holiday stockings. Some kids in book clubs make one each season or as a special memento for finishing a challenging read.
- Class Projects: Picking colors that fit your school mascot or a book’s theme gives everyone a sense of teamwork and group pride.
- Reading Challenges: Letting kids “earn” new bookmarks for every few books read encourages enthusiastic reading.
- Holiday Craft Fairs: Beaded bookmarks are easy to make in batches, making them a low-cost, high-impact item for fundraising tables or DIY activity booths.
Families with more than one reader love using bookmark colors to tell who’s reading what, while book lovers often mix up their bookmark patterns to match moods or literary genres.
Frequently Asked Questions
Here are some repeat questions parents and young crafters ask about making beaded bookmarks—and the tips I share:
Question: What’s the best age to start this activity?
Answer: Most kids ages four and up can join this project with a bit of guidance. Younger kids benefit from larger beads and sturdy ribbon to make things easier.
Question: Where do you find good beads and ribbon?
Answer: Craft stores are the usual go-to, but dollar stores and some online retailers have wallet-friendly variety packs. You can also use odds and ends left over from past craft projects—it’s a great way to recycle.
Question: How long does it take to make one?
Answer: Making a beaded bookmark usually takes 10–20 minutes start to finish, which makes it ideal for both quick afternoon projects and extended craft time at events or parties.
Question: Can kids do this solo?
Answer: Older kids can usually handle the steps alone, but children under seven or eight will likely need help with scissors and knots. With supervision, this project is a favorite for kids’ self-expression.
Final Thoughts
Crafting beaded bookmarks is a fun, creative way for kids to make something useful and memorable. Whether you’re looking for a rainy day distraction, a group activity, or a thoughtful, homemade gift, these bookmarks put a smile on everyone’s face and bring reading to life, long after craft time wraps up. I keep a stash of supplies handy because you never know when inspiration for a beaded masterpiece might hit!
If you have any questions or comments, you’re welcome to share them in the comments below- Im here and glad to hear from you.